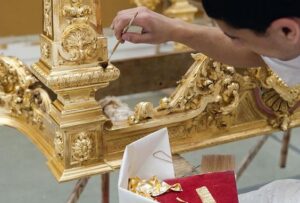
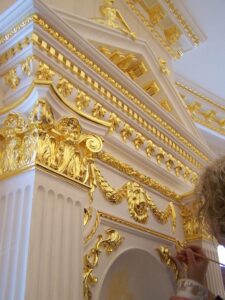
Thanks to the physical, malleable properties of gold, it can be hammered to become thin sheets which are known as gold leaf. Gold leaf gilding is one of the most ideal ways of improving the appearance of various valued objects. After the gold leaf has been successfully gilded on, it should look glorious. To buy yourself some gold leaf to gild onto objects in your home, head to Barnabas Gold.
Prime The Surface
As with anything, failing to prepare is preparing to fail. Examine your valued object and check if the surface needs to be sanded first. If it does, add a relevant primer and ensure that the surface is not porous. That should enhance the adhesion of the gold leaf and make sure that the gilding remains in place.
Should you desire a warm and rich finish then apply a red-colored paint or some clay to act as a primer. The red color will work as an undertone to the gold leaf and make it appear more formidable.
Apply The Size
The size is not something that is measured but is the name of the adhesive used to fix the gold leaf to the surface. That could be oil-based or water-based and that depends on the object itself. Pay attention to the type of size as it will need to be applied in different ways.
For instance, a water-based size should be used indoors rather than outdoors. You can expect this type of size to get tacky within about 20 minutes, after which you can apply the gold leaf. There is a window of around 36 hours to finish off the gilding so this should be applicable to large surfaces. If you are gilding a ceiling or wall then a water-based size is appropriate.
An oil-based size has a range of drying times, from 1.5 hours all the way to a whole day. The quick-dry versions will be tacky in around 1.5 hours so you have around two hours for gilding. Be careful with the amount of size and only use as much as you think you can gild with. This is ideal for small projects of high quality so use a decent oxtail brush to apply even coats.
Apply The Gold Leaf
There are also two types of gold leaf that you can use; the loose leaf and the transfer leaf. With transfer leaf, you simply take the sheet of gold leaf from the booklet and then place it face down on the sized area. To release the gold leaf, rub the reverse side of the backing paper very gently. Fill in the gaps of the leaves to have full coverage and you can expect an overlap of around 2mm.
For loose leaf, again, be careful to remove the gold leaf from the booklet. You may want to use a soft brush or a specific gilder's tip to successfully apply it.
The Finishing
For the best finish, you need to be patient. Once all of your gold leaf is successfully applied, allow your size to dry underneath it. To create a great finish, lightly brush over your surface until you achieve a shine. For any gaps in the gold leaf, use some skewings to touch them up. Before you seal it all up, give your object a final inspection to make sure it looks just right.

The Sealing
The majority of gilded items will require an antiquated finish to act as protection. However, a genuine gold leaf of 22 carats and over does not require sealing. It may even look better without a varnish being applied.
Use a sealant and apply it gently over the gold leaf. Should you want to apply some acrylic paint, you can paint the object first, seal it up, and then apply the gilding on top. By applying the sealing on top of the paint, it should prevent that layer from having an effect on the gold leaf.
Summary
Gilding with gold leaf should not seem as daunting as it might do. Sure, it is valuable but the finished effect is well worth the effort but you should treat it carefully. Make sure that you prime your object's surface first to ensure that the size has a decent application. Choose your type of size carefully and then gently apply the gold leaf itself.
The finished effect should show complete coverage and you should be confident in carefully applying a finish. Finally, if your gold leaf requires it then apply a sealing to make sure that the gold leaf is durable.


